
Key Takeaways
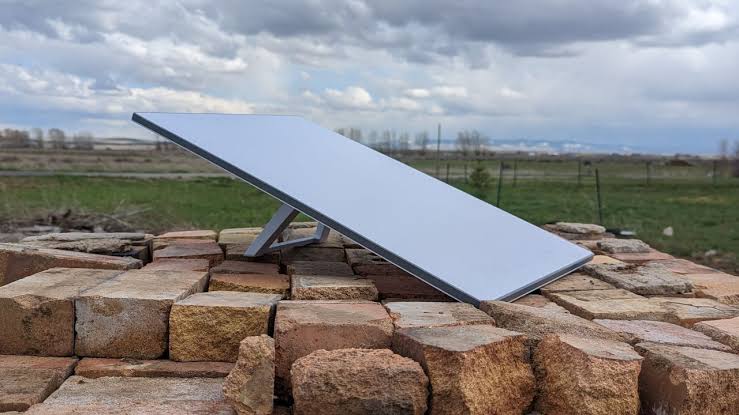
When it comes to installing the Starlink dish, selecting the right location is paramount. It must have a clear line of sight to the satellites, free from obstructions like trees or buildings.
Ground conditions also matter greatly; unstable terrain can introduce vibrations, which might jeopardize connectivity. Therefore, choosing firm and even surfaces is recommended whenever possible.
Acquiring essential tools for the installation, including a level, power drill, and measuring tape, can significantly enhance efficiency and simplify the entire process.
Preparation plays a crucial role as well. Clearing the area of any obstacles and making sure batteries are charged helps minimize distractions and potential errors.
Properly securing the Starlink dish is something many overlook, but inadequate mounting can lead to signal distortion due to wind or movement.
In the mounting process, using materials like marine-grade stainless steel and water-sealing tape is essential for achieving long-lasting stability.
Configuring the Starlink app correctly is vital for optimal performance. This allows users to manage connectivity and adjust settings based on real-time feedback.
Choosing the Right Location for Your Starlink Dish
Selecting the perfect spot for the Starlink dish is crucial. The success of any rv starlink installation hinges on the dish’s ability to communicate effectively with the satellites above. Achieving a clear line of sight to the sky is necessary—no obstructions like trees, buildings, or mountains should be present. What do experts suggest? Either a location on the roof or a tripod-mounted system could be optimal.
Why Line of Sight Matters for Connectivity
A clear line of sight ensures unobstructed communication between the dish and satellites. When those satellites are positioned above the horizon, they facilitate reliable internet access. Any obstruction can degrade the quality of that signal. Clients sometimes think they can place their dish anywhere, but that’s misleading. A few moments spent evaluating the surroundings can prevent a lot of frustration down the line.
- Identify tall trees or buildings that might block the view.
- Pay attention to the geographic angle of the location; higher ground typically provides clearer skies.
- Use observational tools or apps to examine satellite coverage in the chosen area.
Assessing Ground Conditions: A Must for Stability
Stable ground conditions are key when deciding where to install the Starlink dish. Unstable surfaces can lead to annoying vibrations that may interfere with connectivity. It’s worth taking a moment to assess the terrain beneath the RV. Is it rocky, muddy, or soft? Wind exposure is another factor to contemplate. A dish situated on a precarious surface might easily tilt or topple during inclement weather, completely sabotaging the setup.
- Seek out level, flat ground whenever possible.
- Steer clear of areas with excess moisture; loose soil can lead to the dish sinking.
- Mark the intended installation point to ensure an easy return during setup.
Essential Tools for a Successful Installation
Investing in proper tools can significantly ease the installation process, often allowing it to proceed more swiftly than anticipated. From measuring devices to robust mounts, having the essential tools ready is vital. This preparation could save hours spent on reconfiguring and prevent future headaches.
Top Equipment Recommendations for DIY Installers
Knowing which tools are necessary is a significant part of the challenge. Professionals typically provide a list of equipment that can improve installation efficiency. For instance, an orbital sander can smooth out mounting surfaces, while water-sealing tape is crucial for ensuring that connections remain intact.
- A level to verify that the dish is set perfectly horizontal.
- A power drill or screwdriver for quickly creating needed holes.
- Measuring tape for ensuring accurate placement.
How to Prep Your RV for the Installation Process
Proper preparation ensures a smoother installation experience. The first step involves clearing the area around the RV. This means removing any loose items nearby, such as outdoor furniture, obstacles, or debris that might get in the way. Additionally, charging batteries ahead of time can save time during the setup process. Distractions often lead to mistakes that require redoing all the hard work.
Setting aside a few hours specifically for the installation is also advisable. Rushing can only lead to avoidable errors.
Bracing and Securing Your Starlink Dish: Best Practices
Securing the dish may seem straightforward but is frequently ignored. Many client issues arise from a poorly secured unit. If the dish isn’t braced properly, it may become distorted due to wind or unexpected movements.
Effective Mounting Techniques to Withstand Wind
Choosing a suitable mounting mechanism is crucial. Various mounts are available that can endure severe winds. Clients often neglect to consider weight distribution when selecting a location. This factor is important for stabilization. A mounting pole should be firmly anchored and constructed from durable materials.
- Marine-grade stainless steel is recommended for corrosion resistance.
- Consider incorporating guy wires for added support, especially for elevated installations.
- Regularly check the tension of mounting bolts after installation.
Tips for Troubleshooting Common Mounting Issues
Even the most carefully laid plans can experience hiccups. Sometimes, the loss of signal relates more to how the dish is mounted rather than the surrounding environment. Positioning is crucial. Should clients notice a lack of performance, several troubleshooting strategies can prove useful.
- Inspect visible angles and adjust the dish periodically until an optimal position is achieved.
- Check for loose connections and tighten them; often, a quick adjustment can yield significant improvements.
- Reassess the area for any new obstructions that might have appeared, potentially blocking the signal.
Setting Up Your Starlink Network for Optimal Performance
After the physical setup, it’s time to configure the Starlink network to ensure peak performance. Familiarity with the software can significantly impact the overall experience.
Configuring the App: Step-by-Step Insights
The companion app acts as the command center for managing all Starlink functionalities. While initial setup might intimidate some users, it doesn’t have to be complicated. Following a clear, structured approach can greatly simplify the process. The app provides real-time feedback on satellite connectivity, making adjustments straightforward.
- Create an account in the app—make sure to input accurate details for the best outcome.
- Begin the setup process by scanning QR codes provided with the hardware.
- Keep a close eye on signal strength indicators for any necessary adjustments.
Connecting Multiple Devices: What You Should Know
Many users desire to configure their Starlink network in a way that supports multiple devices at once. This flexibility is especially valuable while traveling. However, it’s important to note that while Starlink supports multiple devices, users may encounter reduced bandwidth if too many connections are active. Understanding device limits is essential for maintaining optimal performance.
- Limit high-bandwidth activities running simultaneously to prevent congestion.
- Regularly update firmware for all connected devices to ensure compatibility.
- Establish network priorities to enhance connectivity where it’s most needed.
Reliable internet service while on the road can make all the difference for RV enthusiasts. A well-planned RV Starlink installation is well worth the effort.
Giving the installation process the time it deserves and paying attention to detail, while steering clear of common pitfalls, will undoubtedly enhance the overall experience. By following these tips, clients can look forward to smooth connectivity wherever their journeys take them.
FAQ
How does weather impact Starlink dish performance?
Weather conditions can dramatically affect Starlink connectivity. Heavy rain, snow, or even ice may obstruct the line of sight, resulting in signal loss. It’s wise for users to periodically check their dish for accumulated debris during adverse weather to keep performance optimal.
Can the Starlink dish be moved once installed?
Absolutely, the Starlink dish can be relocated. However, it’s essential to reassess any new location for obstructions before making the move. Each new setting demands careful consideration to ensure continuous optimal performance and a clear line of sight to the satellites.
What are the power requirements for the Starlink system?
The Starlink dish necessitates a power source, typically provided through a standard AC outlet via the included power adapter. It’s advisable to verify that the power supply meets system specifications to avoid service interruptions.
What maintenance does the Starlink dish need over time?
Regular maintenance involves inspecting the mounting hardware for tightness and cleaning the dish to remove any dirt or debris. Conducting seasonal checks is beneficial to ensure that the dish remains unobstructed and securely mounted during extreme weather conditions.
Are there specific apps for monitoring Starlink performance?
The primary tool for managing Starlink performance is the Starlink app, which offers real-time updates, signal strength indicators, and diagnostic tools. Additionally, users may explore third-party apps that analyze network performance, though the official app is typically the most reliable option.
What are the limitations of using Starlink while traveling?
Despite the mobility that Starlink offers, users may encounter limitations in urban environments where interference from buildings or trees is prevalent. Signal strength can vary based on location, which makes careful planning crucial for maintaining uninterrupted service.
What options exist for mounting the Starlink dish on an RV?
Several mounting alternatives are available, including roof mounts, tripod stands, or adjustable poles. Each method should ensure a solid foundation while considering wind resistance and the ease of adjustment for optimal positioning.
Is there customer support available for installation issues?
Yes, Starlink provides customer support to assist with installation and technical challenges. Users can reach out via the app or website for troubleshooting assistance, and numerous online communities also share experiences and solutions for common installation queries.
